Tuesday, December 22, 2009
Neighbor gifts
Wednesday, December 16, 2009
Christmas Cards gone digital!
My goal for next year is to make at least 5 Christmas cards a month starting in January. This way by December I will have plenty of cards and I won't stress so much come time to send them. That's the plan anyway. ;o) I will be sitting down in the next week or so to make a Birthday card for my neice. So I will have that for you soon. I promise it won't be a month before I post again!
Oh, and adoption update. We are still waiting to be chosen. Our agency profile is officially updated and we are good to go and back online with them. We are also in the process of looking into getting approved for the states Foster to Adopt program. You can help us get the word out that we are hoping to adopt. Take a look at the right sidebar. You'll see our adoption blog button and an HTML code to go with it. copy and paste that HTML code into a gadget on your blog and viola! A button directing others to our blog. (BTW, the button, was made by me, using My Digital Studio. Soooo quick and easy, I love it!) If you want to stay updated on us and our journey, other than my occasional updates, I update our adoption blog often so check it out. :D
Wednesday, November 18, 2009
Look at me! I'm digi-scrappin!
Most of my pictures are on my computer so I had a hard time trying to edit the images, send them to snapfish to get printed and then when I would received the prints I would find I would spend hours at my craft table just trying to do 1 page. Then I would get discouraged before even finishing that 1 page and would walk away. This has made it so easy for me to scrapbook. I love it!!!
Here are just a few of my favs. I used the already put together for you Christmas kit and just dropped my pictures in, did some journaling, a little tweaking and tada! I did use a little creative liberty on some of the pages. Like on the one with the white background and red blocks. The predone layout showed pictures there, I took out the space for pictures, left the red blocks and had this as journaling page.
Not bad for my first attempt at digiscraping!
Tuesday, November 17, 2009
A little of this, a little of that
In the meantime I have been blogging like crazy over at our family blog. Partially because blogging on that blog takes no more effort then sitting here, but mostly because of what November is. Did you know, that November is National Adoption Month? Did you know that this weekend, Saturday to be exact, is National Adoption Day? In honor of National Adoption Month I have been blogging each day about adoption. The first week my posts were all about adoption resources that I have found. Last week was all about adoption success stories and families who have been brought together through adoption. This week I am blogging all about other families hoping to adopt and next week I will be spotlighting birth moms. Starting with a profile of my cousin who placed her son 5 yrs ago. So be sure and check that out.
Anyhow, I realized the other day that I never shared the photos I had taken of the family I shot in July. This was the family of 15. So here are just a few of those.
this was the whole clan. This was my first time doing a group larger than 8 so I wasn't thrilled with the large group shots, but I did like some of the smaller ones.
This one is the grandparents in this group.
This one is a candid of two of the grandsons.
One of the families, I dubbed them the blue family since they were all wearing blue.
This is the brown family since they were all wearing brown.
One thing I learned with this shoot is that 10 a.m. is not a good time to shoot. That was the time the family requested though so I went with it. The sun was way to bright though as you can see in some of the pictures.
I also don't remember if I ever shared these. I did a shoot with some friends of mine who are also hoping to adopt. These photos were for their adoption profile. Here are just a couple of my favorites.
Tuesday, October 20, 2009
WCMD challenge 5
In this challenge we had to make a Holiday Ornament. I didn't want to do the traditional glass ball that I do when I do Christmas Ornaments. Instead I started going through my chipboard to find a good base. I found a large circle and decided to go with that. The paper I chose was Vintage Holiday from TAC. I placed my cicle on the paper and traced around it and then cut along the lines. Then I used some creamy caramel ink to give it an aged look. I attached the paper using some modge podge then added some ribbon. My image is from SU and is the set A Very Merry Christmas (retired). I colored it using colored pencils, punched it out using my circle punch and mounted it onto real read with I punched out with the scallop circle punch. Using my white Signo gel pen I placed a dot on each scallop to give it some dimension. I mounted the focal image using dimensionals so that it sits off the ornament just slightly. I used my crop-a-dile to punch the hole through the ornament (since it is thicker because of the chipboard, I knew the crop-a-dile would work beautifully) and then threaded some of the same ribbon I used on the ornament for the top to hang the ornament from a tree. It's not quite what I set out to do, but I was happy with it. :D
Friday, October 16, 2009
WCMD challenge 4
Sorry! I know it's been awhile since I posted a card from World Card Making Day! Sorry!
This challenge was hosted by some of the Splitcoast Ladies. This challenge was a 3 part challenge. The first part was, it had to be a Thank You card, then it had to include the color Chocolate (or a different shade of brown) and it had to follow this sketch. Love the way this card turned out!
First I stamped my roses and leaves using the A Rose Is A Rose stamp set and the ink colors I used were Regal Rose, Pretty In Pink, Mellow Moss and Chocolate Chip (I stamped the chocolate chip off once before stamping on the peice) Afterwards, to give it an aged look I used the DTP technique on the peice. Then I mounted it onto Mellow Moss CS and stitched along the edges. I mounted that whole peice to my Chocolate Chip card base and added some flowers for fun. The saying at the bottom is a white rub-on.
I still have my ornament to show you so look for that soon. I will be starting on my Christmas Cards shortly so I'll have those for you soon too.
Tuesday, October 13, 2009
Cookie!!!!
Anyhow, I know I owe you a card, I will post one soon. Right now I'm too tired to post one, but I figured I would post something crafty, so here is a cake I made for my brother-in-laws birthday a couple of weeks ago. He turned 36 and when he was asked what kind of a cake he wanted he said a Cookie Monster cake. Apparently Cookie was his favorite character growing up. I don't have a Cookie Monster cake pan, so I made up my own cake. I think it turned out pretty darn cute. What do you think?
More cards and stuff to come, I promise.
Saturday, October 10, 2009
WCMD challenge 3
I figure since I am up, (and he is in his office feeding his fish and probably updating Facebook), I figured I would post another card from World Card Making Day.
This one was for the Stamping Bella challenge. Now I do happen to own a few bellas (as the stamps are called), and I love them! Bella's are so cute and are a must for any stamper. Just sayin'. Anyhow, this challenge was to do a card showing what you and your friends like to do, the twist to that was we had to make the card with an 80's theme.
Now when I think 80's, I think tie dye. My husband was confused by this when I told him that. To him, tie dye is 60's. He's right, but see, I remember growing up making tie dye shirts at summer day camps, and friends birthday parties. So to me, 80's is tie dye. So, for this card I did an 80's tie dye, bella card. My friends and I love to just hang out, goof around, and chat. So here's my card:
The tie dye was done with the shaving cream technique. I used 4 different colored reinkers for the background. (Real red, yo yo yellow, tempting turqouise, and green galore). I love how the background turned out, totally remeniscent of the tie dye t-shirts I used to make with my friends when I was younger. :D I mounted the bg onto a real red card base then I colored the bella (PMSabella) with copics and mounted her onto Taken With Teal (I'm trying to make myself like this color, can you tell?). I added some ribbon and mounted this onto the card. After putting the card together I decided it needed something so I punched 2 flowers out of some extra tie dyed cardstock and put them together with a brad to finish it off. Seriously love this card. Call me crazy, but I do. :D
I do have a couple more from WCMD that I still need to post, including a christmas ornament, but I can't keep my eyes open so those will have to wait. The pillow is calling my name. :D
Thursday, October 08, 2009
WCMD challenge 2
Anyhow, here is another card I did for WCMD. This one was for the Crafty Secrets Challenge. Again, I don't own any of their products yet. We've been saving for the move and for our adoption, so I haven't actually bought anything in a year, well, until I made over my craft area that is. That about covers my spending for the next year. LOL
Anyhow, back to the card. This challenge was to make a poppin' card. We had to pop the card with dimension somehow. I chose to do this in 2 ways.
First I stamped my solid butterfly in Yo Yo Yellow, then I stamped the same solid butterfly in Yo Yo Yellow again on another peice of cardstock. I then stamped the flowered butterfly overlay in Real Red on top of the second peice of Yo Yo Yellow. Then I cut around this two layered butterfly and then bent the edges. After that I attached it to the first butterfly, this was to give the butterfly's wings some dimension. Then I stamped the saying and mounted the peice on real red cardstock. I added more dimension but raising this whole peice using dimensionals and mounting it on my Taken With Teal Card base. I decided to add a peice of ribbon and luckily was able to slide it under the already mounted raised peice and attach it from there. I know, it's simple, but that's what I prefer. :D
Monday, October 05, 2009
WCMD challenge 1
The first challenge was sponsored by Unity Stamp Company I don't own any of their products yet, but the key word there is yet! This challenge was to use a quote or a saying as the main focal point on your card. So I went through my stash and found one of my favorite quotes for cards to make for my soldier when he was deployed. "I wouldn't mind being lonely, if you were here to keep me company". this card was simple. I just cut a strip of patterned paper from a paper pack I have from Hobby Lobby and I mounted it on Chocolate Chip. I paper pierced and stitched then mounted that onto the card base of Taken With Teal. I added some Chocolate grosgrain ribbon just for an added touch. Then added my saying which I stamped using Chocolate Chip Ink and mounted on more Taken With Teal.
I should add that, the folks over at Splitcoast and all the member companies joined together with Operation Write Home to have all of us crafters who wanted to, donate our cards to OWH. Operation Write Home is an awesome cause. I know first hand how much the soldiers love it when they can send hand stamped cards home to their loved ones. I received a few myself from my husband from organizations just like OWH.
More cards still to come in the next week, so stay tuned!
Friday, October 02, 2009
Just in time for world card making day!
Let's take a closer look at the craft area: On the side of the counter there is about 9 inches where I store my tables and ironing board (and my step stool because I'm short and can't reach the top shelves in the cabinets LOL! When I want to work I can just take those out and stamp and then put them back when I'm done.
Sunday, September 20, 2009
A peek at my new craft area (A work in progress)
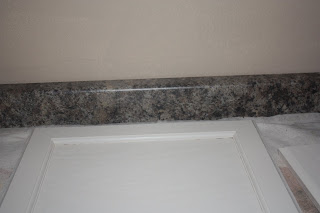
The laundry area is in a closet just off this area, The washer and dryer have been pulled out of that area so we can tile underneath them. Once the grout is all done we will move them back and will finish off this area you see. We ripped out the makeshift closet that was in the corner and put wall to wall cabinets and a counter top. This will be my craft area. I am painting the cabinets a creamy bone white. the walls will be a Golden Crust color (that's the name of the Dutch Boy color) and the countertops are a pretty Granite look.
A close up of the cabinet area. After we are done painting these we will install new laminate (wood) floors (we already ripped out the carpet in this area). I have some fold up tables that will go in the corner and be pulled out when I am ready to work on stamp projects.
A close up on the cabinet color. You can see the countertops as well.
We hope to be done with all this in another couple of days. As soon as we're done I'll post pictures, and then I can start stamping again! YAY!!
Monday, September 07, 2009
We're here!!
Saturday, August 29, 2009
Moving Cards (The rest of them)
Anyhow, because I have been so busy I have been forgetting to post the rest of the moving cards. So here they are: This is the same set I used for last years moving cards but I wanted to use it again, since it is the only moving type card we have (hence why all the rest of the cards have been non-moving themed). So this time I made it an all white card by stamping the truck in the center and adding the guy driving and the moving items in the back of the truck. All were stamped with momento black tuxedo ink. I then colored the image using markers and a glitter gel pen for the hub caps, door handle and bumpers. I finished it off by adding the sentiment at the bottom. (Stamp set- Loads Of Love and Loads Of Love Accessories by Stampin Up!; cardstock- Whisper White Stamping Up!; Markers- Copic Markers; Gel Pen- unknown; Ink- Momento)
This next one I started out by printing the sentiment at the bottom of the cardstock (took a few tries on scrap paper to get the placement right) and then used the faux framing technique (also known as reverse masking) to sponge my Pale Plum ink all over. Once I got the coverage I liked I then stamped my images randomly using Perfect Plum and Mellow Moss. (Stamp Set- Heartfelt Thanks by Stampin Up!; Sentiment- My Printer; Ink- Pale Plum, Perfect Plum, Mellow Moss By Stampin Up!; Cardstock- Whisper White by Stampin Up!) The pale plum ink started seeping through the mask after 5 cards and I didn't want to make a new mask so for the other 5 cards I did this way simple (possibly too simple, meaning I might tweak it later) card:
This one was simple, as you can see all I did was stamp 3 flowers using Pale Plum, Perfect Plum and Mellow Moss. So simple, So easy. (Supplies are same as above card)
So there you have it. The rest of my We're moving cards. I didn't have time to send them out before we left so I will do that when we get there. Probably not till we're settled though. Anyhow, today we are taking a break from packing (partly because we can't do anymore. What we have left is the stuff we still need, like clothes, so that will all get packed on Monday and Tuesday.) Instead, we are going out with some friends of ours who are also hoping to adopt. We're going to try a new wing place in town. Should be lots of fun! :D I probably won't post again until we are in our new home so see you then!
Sunday, August 23, 2009
Crock Pot Sunday- Caramelized Onion Pot Roast
Anyhow, this recipe is also from that same Betty Crocker Slow Cooker Cookbook, but I put a twist on it. The recipe calls for Beer and we don't drink so I used Root Beer instead. The recipe also calls for Dijion mustard. We didn't want to buy any since we are moving so soon. So I used what we had which was Honey Mustard. I have to tell you, this recipe turned out soooo yummy! It calls for 4 lbs. of roast which is a lot, ecspecially when it's just my husband and I. But I ended up being able to cook the roast, and use it 3 different ways for 3 different meals and a lot of lunch leftovers. :D Anyhow, here it is:
Caramelized Onion Pot Roast
4 lbs. beef boneless chuck roast (I actually prefer the leanest roast I can find so, use whatever you like)
1 tablespoon Olive or Vegetable Oil
1 teaspoon salt
½ teaspoon pepper
6 medium onions, sliced into thin rings
1 ½ cups beef broth
¾ cup beer (I used root beer)
2 tablespoon packed brown sugar
3 tablespoon Dijon Mustard (I used honey mustard)
2 tablespoon cider vinegar
1. Trim excess fat from beef. Heat oil in 10-inch skillet over medium-high heat. Cook beef in oil about 10 minutes, turning occasionally, until brown on all sides. Sprinkle with salt and pepper.
2. Place onions in 3 ½ to 6 quart slow cooker. Place beef on onions.
3. Mix remaining ingredients; pour over beef and onions. Cover and cook on low heat setting for 8 to 10 hours or until beef is tender.
4. Remove beef and onions from cooker, using slotted spoon. Cut beef into slices. Skim fat from juices in cooker if desired. Serve beef with juices.
And as an added bonus, like I said, we ended up being able to use this for 3 seperate meals. The one we always use left over roast for is BBQ Beef Sandwiches. This is one hubby really likes to make.
All he does is takes the leftover roast, shreds it (which with how it cooks up in the crock pot it shreds beautifully)Then he puts it in a pot with BBQ Sauce, flavor of your choice and lets it simmer for 5-10 minutes. Serve with fries or something on the side on a toasted bun and viola! Yummy!
For this particular one hubby used Honey BBQ Sauce, and added a little honey and A-1 sauce. Good stuff!
The 3rd meal, I don't have a picture of, but we shredded the roast and put it in a pan with some taco seasoning (just the kind you get in the seasoning packet works great) and cooked it according to the directions on the packet of seasoning mix. And we had shredded beef tacos. Sooo good!
I love meals like this, where you can cook once and make a few seperate meals. *grin*
Stay tuned in the next day or two for another moving card. :D
Thursday, August 20, 2009
It's Official!! We're Homeowners!!!
Our house is going to take work to get it to where we want it to be. We know that. That is actually what we wanted. We wanted a home that we could make our own. We didn't want to pay $20K more for upgrades that someone else did that may not be quite our tastes. The same upgrades that we could do ourselves for half that, and they would be our tastes. *big grin* We're sooooo excited! My mom went on the walkthrough on Monday and went over again on Tuesday to take more pictures. So here are some photos from that. The front of our house. It needs a good power washing to get all the dirt that collects over the years off the house. We are going to spruce up the landscaping and are considering doing maybe some flower boxes under those two front upper windows you see. They are too thin to me and need some help, so some simple window boxes should do the trick. This is our living room. This room will be painted a pretty taupe color, will have the flooring changed out (eventually, for now it will be covered with my gorgeous burgundy rug that Jacob got me while he was deployed to Afghanistan). This room will have the window coverings changes and will have my piano, my antiques and some furniture that my mom is recovering for us. This is our kitchen. We are going to refinish the cabinets, replace the countertops and backsplash and paint. In a few years we will redo the whole kitchen.
I will share more pictures later. For now I just wanted to share the good news!! I need to get some more packing and cleaning done. We are over halfway packed and in fact all 3 bedrooms are packed, empty and cleaned out with the doors closed. We're making progress. Just 2 weeks till we move!!!
I will also be posting this weeks crock pot recipe in the next couple of days along with another card. I haven't forgotten. I have just been so busy with phone calls and paperwork and everything that goes with buying a house long distance. Well, everything that goes with buying a house for that matter! LOL
Sunday, August 16, 2009
Moving cards part 2
Until then, I wanted to share my next card that I did for our upcoming move.
Remember the announcements that I did for my brother-in-law and his new wife before they got married? Well, I had a ton of cardstock left because I over ordered accidentally. Luckily Night of Navy is a color I like to use. So I figured it would be the perfect color to use for this next card. For this one I used Night of Navy as my card base. I added some Brocade Blue to it down the middle of the card base. Then I added my stamped image (I used Stampin' Write Markers, not ink) from Garden Silouhettes (can you tell that's my favorite set?) I printed up the words Home Sweet Home for my sentiment onto Whisper White and added that at the bottom. I added some paper peircing (may be hard to see in the photo) and some ribbon down the side. Really simple and easy. I like how they turned out. I did 10 of these as well.
I thought Home Sweet Home would be a nice sentiment to use for some of my cards because it fits oh so well. First of all, we are not only moving, but we are moving into our very first home that we will actually own. Up until now we have always lived in apartments or military housing. This will be the first home that we have ever bought. As if that wasn't exciting enough, we are moving, not only to our very own home, but to our very own home back home! Clear as mud? *wink* Well, let's put it this way. For the last 6 years hubby has been in the military so we moved away from home to live in other states. Hubby is about down with his Active Duty status (he has joined the Reserves) so this means we can move back home to Utah. So to Utah we are headed. We have more family there then when we lived there before. So we are extra excited. And I thought that Home Sweet Home fit in so many ways for these cards. *big HUGE grin*
I will post the Crock Pot Sunday in a couple of days. For now, I'm heading to bed. Tomorrow I am packing my cake stuff since I don't plan to make any cakes between now and when we move (less than 3 weeks now!!)
Wednesday, August 12, 2009
Crock Pot Sunday- Swiss Steak Supper
Anyhow, on to this weeks Crock Pot meal.
Also from the Betty Crocker Slow Cooker cookbook--
Swiss Steak Supper
1 1/2 lbs. beef boneless round steak
1/2 peppered seasoned salt
6 to 8 new potatoes
1 1/2 cup baby carrots 1 medium onion, sliced
1 can (14 1/2 ounces) diced tomatoes with basil, garlic, and oregano, undrained
1 jar (12 ounces) home style beef gravy
Chopped Parsley, if desired
1. Trim excess fat from beed. Cut beef into 6 serving peices. Spray 12-inch skillet with non-stick cooking spra; heat over medium-high heat. Sprinkle beef with seasoned salt. Cook beef in skillet about 8 minutes, turning once until brown.
2. Layer potatoes, carrots, beef and onion in 3 1/2 to 6 quart slow cooker. Mix tomatoes and gravy in a bowl. Spoon over beef and vegetables.
3. Cover and cook on low heat setting 7 to 9 hours or until beef and vegetables are tender. Sprinkle with Parsley if desired.
This meal was so easy, and oh so yummy! I did up some croisants to go with it. (the picture is hubby's plate, it looked better then mine) I will post another card soon so stay tuned for that! Now to get more packing done! Only 3 weeks till we move!!
Tuesday, August 11, 2009
Moving cards part 1
This card is a no stamp card. I printed the sentiment on my printer using Very Vanilla Cardstock and then mounted it onto Taken With Teal. The printed paper is from a paper pack I got when I did the recipe tin a few weeks ago. I layered it onto Taken With Teal cardstock and then stitched it using my sewing machine and red thread. Chocolate Chip cardstock was used for the card base. Simple, quick and easy. *grin* I did 10 of these.
I also have a few other designs that I did that I will share later. I need to space them out because my craft room is now in these: All 4 of those boxes are my stamp sets. I have about 14 boxes total of my craft stuff and several rolling cards and cabinets that we just saran wrapped and taped closed (we saran wrapped them so that scorpions and other nasty things don't crawl into them and stow away. Yes, we taped our boxes really well too *wink*).
Monday, August 03, 2009
Crock Pot Sunday- Beef Stroganoff
So I thought I would make a weekly post on my blog with my Sunday Crock Pot recipes. :D
This Sunday I did Beef Stroganoff. I have made this one before and it turned out better last time, but it was still oh so good! (I do have a version of beef stroganoff that only takes about 20 minutes, but sometimes it's nice to do this yummy, melt in your mouth version.) It serves 8 so this recipe makes two meals. I cook it all at once and then freeze half of it. The night before I want to use the frozen portion I take it out of the freezer and put it in the fridge and then heat it on the stove before serving.
From Betty Crocker's Slow Cooker Cookbook:
Beef Stroganoff
2 lbs. beef stew meat
1 large onion, chopped (1 cup)
1 can (10 3/4 ounces) condensed cream of mushroom soup
1 can (10 3/4 ounces) condensed cream of onion soup (our local grocery store doesn't carry cream of onion so we do 2 cans of cream of mushroom and it's delicious)
1 can (8 ounces) sliced mushrooms, drained
1/4 teaspoon pepper
1 package (8 ounces) cream cheese, cubed
1 container (8 ounces) sour cream
6 cups hot, cooked, noodles or rice, for serving, if desired
1. Mix beef, onion, soups, mushrooms, and pepper in 3 1/2 to 6 quart slow cooker.
2. Cover and cook on low heat setting 8 to 10 hours or until beef is very tender.
3. Stir cream cheese into beef mixture until melted. Stir in Sour Cream.
4. Serve beef mixture over noodles or rice.
Serves 8
Isn't that simple! Seriously, the prep time is less than 10 minutes. Perfect for Sundays. Just set it all in the crock pot when you wake up in the morning and it will be ready by dinner time!
I do have about 5 different cards to show you so stay tuned for that!
Today is also my Hubby's and my 8th wedding Anniversary so I just wanted to say Happy Anniversary honey!
Thursday, July 30, 2009
Adoption Blog Button, how you can help! :D
I want to thank my awesome friend Jill! She and I have been friends since high school. I posted on FB asking if anyone knew how to make blog buttons. Not only did Jill come through for me, but she came through in a fabulous way! Our new button is on the right. Isn't it fabulous! She asked what it was I was wanting I told her something blue and brown like our pass along cards (see our other blog for that story). Using that as a referrence she came up with our awesome buttons. *big grin* Now, why am I telling you this? Because you can help us with our hope to adopt! That's right! All you need to do is right click on our button (I posted it above) and save it to your computer. Then go to your blog dashboard, click on layout, click on add gadget, click on add picture. A box will come up with a place to link and also a browse box. In the link area put in our blog address (www.jacobandsharon.blogspot.com) and then where it says browse, add the picture you just saved to your computer of our button. Then click save. It's that simple. Then everytime someone clicks on the button from your blog they will be sent to our blog and will be able to learn all about us. With your help to get the word out, we know our hope to adopt will become a reality!
Sunday, July 26, 2009
Service Auction Recipe Tin
And a closeup:
The ribbons:
Index dividers on the inside:
Recipe Card:
Not to bad huh? I was actually really pleased with the way the various shades all blended together. The index dividers were done in the recipe categories that the winning bidder wanted and then I did 2 blank dividers in case there were any others she wanted to add. I did 30 recipe cards for each category and 20 blank ones for each of the 2 blank categories. She was excited when I showed it to her so I was pleased. :D
The other service that I donated was a photo session with a CD of all the editted images. Little did I know that the winning bidder of that auction would be a professional photographer who wanted me to take photos of her whole family. We are talking her, her husband, 2 of their kids and their spouses (it was supposed to be all 3 kids and their spouses but 1 family was unable to make it) and 9 of their 10 grandchildren. That's right! 15 people in all! I was sooo nervous. First of all, she is a professional, second, 15 people! The largest group I have ever done was 8 at a wedding, and that was 4 years ago and all but 1 were adults! But this group was so fun to work with and because their mom/grandma was a professional, they were all used to photos and posed like the pros they are. It was great! I still need to edit the photos, so I don't have any to show right now, but I will show a few as as soon as I am done.
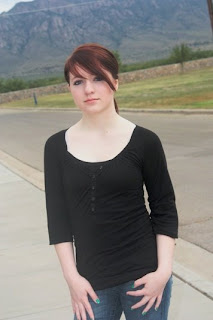
Anyhow, in addition to photo editing I am working on our "hey look, we've moved (again)" cards. We are set to move in just 6 weeks so I need to pack my stamp room. I want to get the cards made before we move because I don't know how many weeks it will be before I can unpack that room. So I will have those to share with you in the next week or so. Until then, I thought I would post this photo I took of my DD Tamara. She had to touch up her now red hair with dye and decided to go a little darker. It is now almost the exact color mine was when I was her age. :D