Showing posts with label Altered Items. Show all posts

Sunday, April 04, 2010

Project for BABY!

We have been getting ready for our new little one to join us in just 115 days. It still seems so far away, but the time is going quickly. With today being Easter we had a nice relaxing day. So I spent a couple of hours making a project for the nursery. Right now the nursery has a pink crib set (which I love!). But I want to make another one (an additional one) that will be, what else but purple and green (with Roses since the baby's middle name is Rose which is her sweet birthmom's middle name). ;o)

A while ago I bought some letters from HL spelling the word BABY. Since we hadn't been chosen yet, and didn't know if our future little one would be a boy or a girl, I hadn't decorated the letters yet. So since we had been chosen now, and our little one is a girl..... Well, see for yourself:

I used the Cottage Wall Designer Series Paper from Stampin Up! I also used some ribbon from the craft store for embelishment on the letters and to hang the letters on the wall. I used Prima Flowers with brads in the center for embelishment as well.

I inked the sides of the letters with Mellow Moss Craft ink (SU) and a sponge. Then I inked the edges of the paper letters. I then attached the paper to the letters using modge podge and then applied a thin layer of modge podge over the finished letter to seal it. I added the ribbon and flowers and used sticky tape to attach the ribbon to the back for hanging.

I hung the letters above the crib:

I love it!

(For some reason everything in these pictures look a little more yellow then what they actually are, but you get the idea. :D)

Thursday, January 15, 2009

The Valentines M&M's...

Valentine's Day 2001 my hubby and I had just gotten engaged. J wanted to make my day special so that day he had come chocolate roses sent to me at work. Not only were there chocolate roses, but the chocolate roses were in a really pretty bud vase with Valentine's M&M's (a.k. white, pink, dark pink, and red) filling the bottom of the vase instead of what would normally be water. Cause they were chocolate roses so they didn't need to be watered. ;) That night I got home and J had gotten a key to my apartment from my friend who lived in the same apt. building (she had my spare key, I had her's, incidentally, she is now my Sister-In-Law, she is married to my husband's brother, she is the one who introduced hubby and I, sorry, off course there). Anyhow, J had gotten the key and gone upstairs to my apt. and made me a really romantic dinner and gave me a hummingbird music box (Handblown glass, hummingbirds have a special meaning to me). The music box played the theme song to Somewhere In Time (which btw, is the bestest most romantic movie of all time!) which is one of my favorite movies. How sweet huh? To top that off, every Valentine's Day since (except when he is deployed or away at training) he has made me the very same dinner. :) I'm a lucky gal!

So anyhow, (if you are still with me, bless you! ;) lol) This Valentine's Day since Hubby and I are saving up for our upcoming adoption we aren't spending any money (o.k. so he already bought me my super cool camera, but that was before we decided to adopt). I still wanted to do something special. I could do a coupon book, you know where I give him coupons he can cash in. O.k. so that would be good but I didn't want to do the same old same old coupon book. I wanted to do it a little different. Then, that first Valentine's Day flashed through my mind. I could do chocolate roses with M&M's but how to incorporate the coupon book idea. I could do tied to each rose a "coupon" of sorts. O.k. but we are both trying to eat healthier so chocolate roses AND M&M's..... hmmmm.... I decided that instead of doing the chocolate roses I would do handmade flowers. So the Nested Flowers technique sprang to mind but how to make an embellishment into an actual flower. AH HA!! I've got it!


First I made my flowers by cutting my different sizes of circles (out of Rose Red DSP from SU) using my Colluzle cutting system that I got when I was an SU demo. Then I distressed the edges of the circles using the side of my scissors. Next I punched a hole in the center of each circle using my crafters tool kit (SU). I then took some floral stem wire and using the plier things in my crafter's tool kit I made a small loop at one end. Then I stuck my brad through that and threaded each circle of the "flower" through the floral wire and then the brad. I fastened the brad to hold it all in place and then wrapped floral tape around each stem to finish the look off plus give it some support. I then used my tag punch (SU) and punched out some tags then stamped the Always stamp from Terrific Tags (retired SU) using Rose Red(SU) ink to coordinate. On the back of each tag I wrote my coupons. Some are a movie night with movie of his choice, a day playing video games (without me nagging him to help me), a week without housework, a day to do wood working (again without me nagging), and the list goes on and on. I tied each tag, or rather coupon to the stem of each flower using some ribbon and then put them in my bud vase. Then I filled the vase with Valentine's M&M's and tied a ribbon around the vase.


There are 14 flowers, 1 for every day till Valentine's Day. He will still get some chocolate without having the chocolate roses added in (although I'm sure he would have liked that too). I hope he likes it! I think he will really like the coupons, ecspecially the ones where I don't nag him for a whole day. ;)

Monday, January 05, 2009

Recipe tin, cake and project 365

This is a project that I created last week and then forgot to take a picture of before I posted the cards. I have done many recipe tins for other people but never one for myself. So I decided it was high time to do so. I have so many recipe books filled with lots and lots of recipes (close to 10,000 recipes in all) but I have my favorites. You know, the old back ups that when you can't decide what to make you make those. So I wanted a place to store the recipes for the favorites in our house. This is what I came up with:
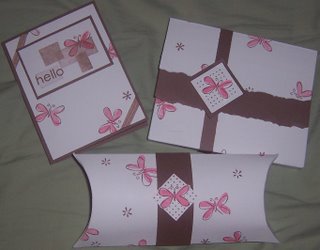
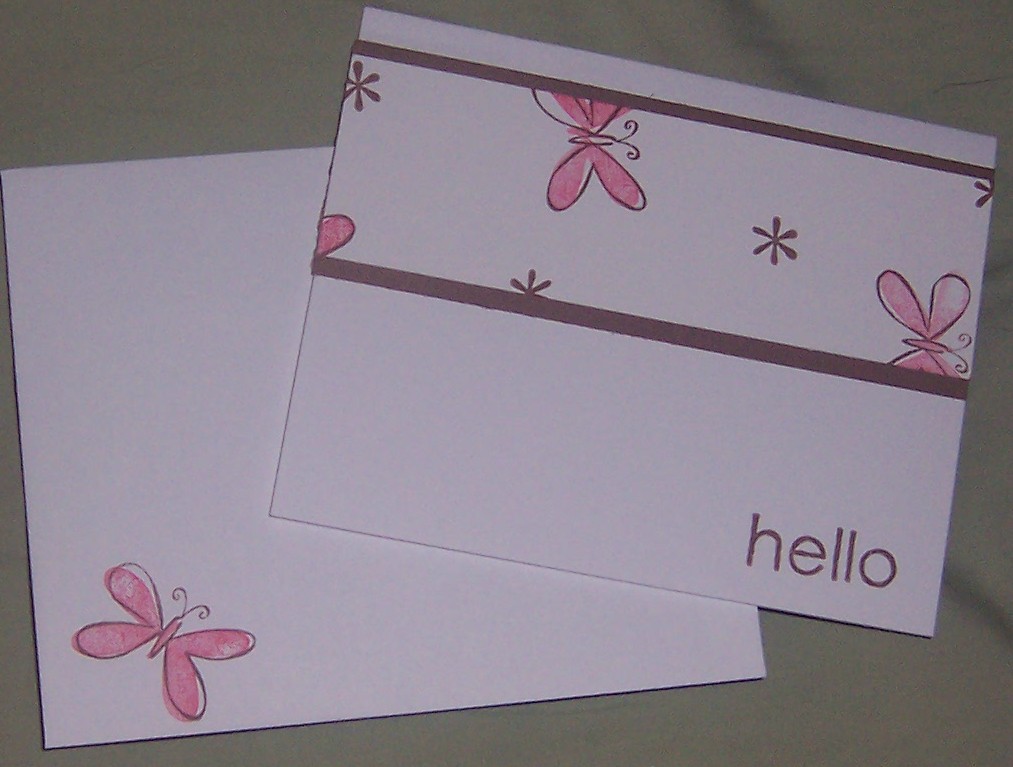
The image is of course Voila from Stampin Up. I used some printed paper that I have had for awhile (sorry I don't know where I got it from). The paper was applied using modge podge and then sealed with it as well. I added the ribbon using sticky strip and then added the image and sentiment with more modge podge. The image was stamped on white CS using Momento Tuxedo black ink and colored with Copics. I stitched the edge of the main image using my crafter's tool kit (SU) and a needle and thread. The flowers I got from a crafts store and the brad was sent to me by a friend in England. I haven't added fibers and ribbon to the handle because I haven't decided whether I want that or not. We'll see.


I haven't blogged the last couple of days because my in-laws have been here visiting. While they were here we decided to celebrate their birthdays. My FIL's birthday is this month and MIL's birthday is next month. So I made a cake. I ran out of powered sugar so I didn't have as much frosting as I usually do and I had to make what I had stretch so I wasn't happy with the final product at all. Plus the day before we had spent the day out and about (one of the places we went was White Sands National Monument and we climbed the sand dunes, so I got quite the workout). I was really worn out by the time Saturday and making the cake came around so I really didn't have the energy to do a good job. But it turned out o.k. and my in-laws liked it so that's all that matters right?


I'm not going to share the picture of my in-laws with the cake because I haven't asked them whether I can post pics of them on my blog. You understand right?

On SCS someone posted about something called Project 365. This is where you take a photo a day for an entire year as a way to kind of mark what you do in your life. Well, I live in the middle of no where with my husband. There isn't much going on in our lives that is worth photo-ops. So instead of taking a photo each day regarding something in our lives I am just going to take a photo a day. The photos may be something special that we did that day, or it may be of scenery or something special that I see, or maybe just something I decided to take a photo of for fun. I figure this will help to improve my photography skills and give me a reason (as if I needed one) to use my new camera each day. Rather then posting the photos here every day I am going to post them on Sunday's. Since I didn't find out about this until last night I will post last weeks photos along with this weeks on Sunday. So be looking for those. :o)

Monday, April 30, 2007

Do you want to win a tin?

On Friday I posted the 10th Technique Friday! And I made it a challenge for you. The challenge was to make a project using that technique and then show me what you did. I made it a contest were you can win a tin decorated by me and filled with embellishments and other goodies! Well, here is the tin! The colors are kind of off on my computer, It's not as bright as this IRL and the ribbons match better IRL too. Anyhow, I just wanted to post a pic so you all can see what your playing for! :) You have until the end of day Wednesday to enter the contest.
For more details on how you can win this fabulous prize, check the post below!

Here is a side view of the tin as well.

Monday, April 16, 2007

Blog Candy packages revealed!

I can finally reveal the blog candy winners prize packages! I would have revealed them sooner but I wanted to wait until the winner's got their items. So without further ado:

Leah's Package!
Leah wanted something done in soft greens and yellows. I had this yummy paper that I got in a Birthday package from my MIL. It was perfect for this so I pulled it out and covered the notebook. I used the speckled composition notebook for this (you know the black and white ones) I used Modge Podge to adhere the paper and then I added some Night Of Navy CS for the binding and sealed the whole thing with a thin layer of the Modge Podge. Then I tied some ribbon around it to finish it off with a tag. Then I did the cards, check book cover and pen to match.


Dorinda's Package!
Dorinda the little sneak (love ya D!) said to just use whatever colors and to surprise her. So I chose to use Red and Black. I used yummy ribbons on the side of the spiral notebook.
Allison's Thank You Gift!
I don't think Allison has gotten her's yet since the package went to Canada so I will just post what it looks like. I went to my monthly stamp club meeting at my demo/uplines house last month and we made this rockin' Photo Wallets! So I just HAD to make one for Allison as a small thank you. Allison likes Earth Elements colors so I used So Saffron (I know, it's a Rich Regal but it went well. lol) Then I used Really Rust, Basic Black, Old Olive, and Not Quite Navy. I started this a while ago (shortly after I decided to make her a thank you gift) but I had to wait on the mini envies for the photo sleeves. Here it is on the outside:


And on the inside:
Thank you again Allison for being sooo awesome! You rock!

I hope all you ladies enjoy your blog goodies! *grin*

Saturday, November 25, 2006

I got to stamp!!

I stamped some stuff for the reveal pacakge for my secret sister on Splitcoast today. I am in love with how all this turned out.
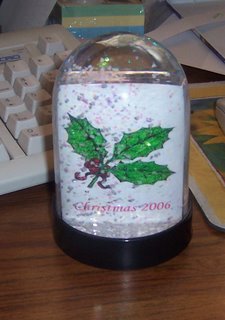
I found create your own photo snowglobes at WalMart for I think like $2 the other day. So I picked up a couple. They are really easy. You just pop the bottom out, use their sample photo as a template for how big you need to cut you cardstock and then you stamp away! I printed the words Christmas 2006 in red on my printer before cutting the cardstock to size. I sure hope she likes this. I love it! I am thinking of going to get some more because they were just that easy. I also stamped some candles and covered some popcorn (her favorite treat) to go in the pacakge. For details on how to stamp on Candles you can either check out the resources page on Splitcoast Stampers.

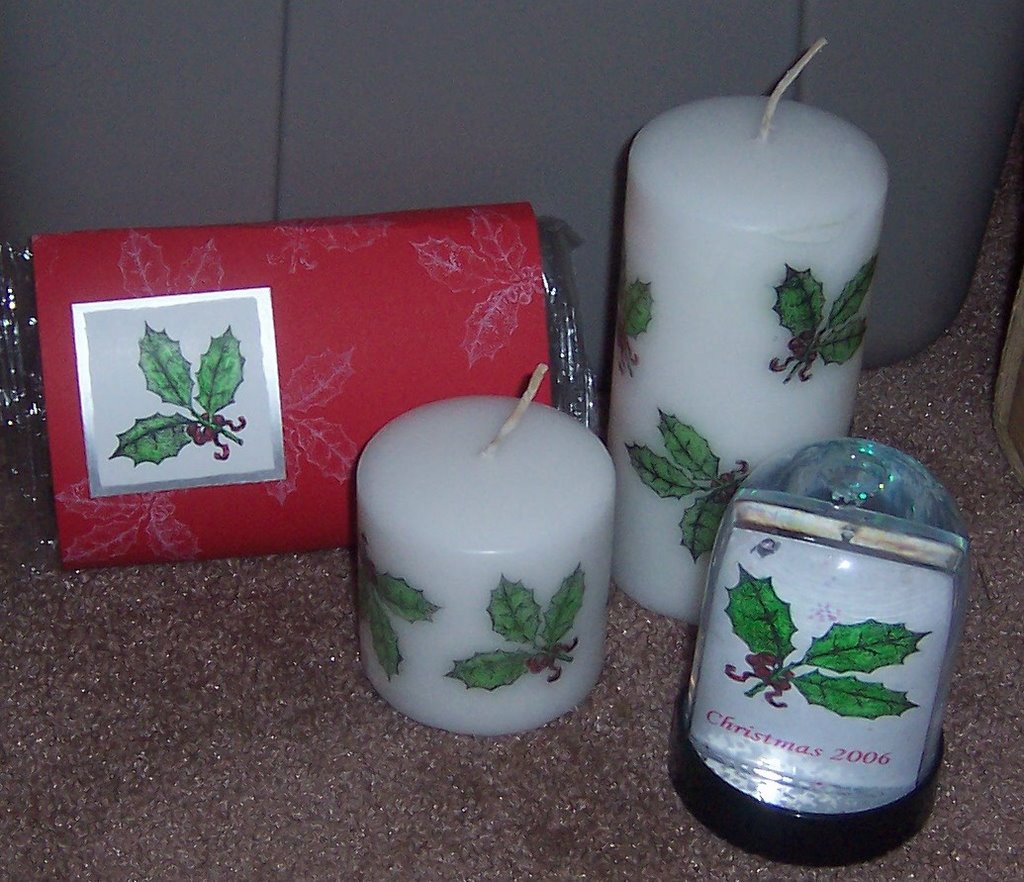
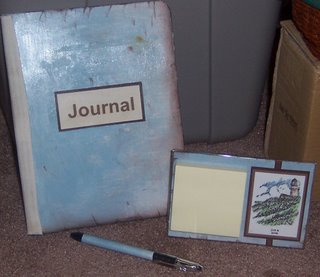
This is the other gift set for my Secret Sister. I coverd a composition notebook using Basic Gray Paper and I ran the ink along the sides to give it an aged look. I ran twill tape up the side of the binding. The word Journal is printed from my printer. The RSVP pen was covered using the same basic gray paper. I have never done an acrylic post it holder before. This was so easy! I am definately going to do more. The Image on the post it holder is from the SU set Always on My Mind. The words Just A Note under the image is from All Year Cheer from SU. For details on how to make your own post it holder check out the resources page on Splitcoast Stampers.


Friday, November 24, 2006

A little holiday cheer for the Engineers!


I am a co leader for the family support group in Jacob's company. All the leaders for all the companies in the battallion got together and planned our holiday party. We had to have it early since our soldiers are all leaving for training today and tomorrow and won't be back until right before Christmas. The party was this last Saturday and was a great success. This year we thought we would do ornaments for each of the families to have if they would like. My co-leader pointed out to everyone that I was a stamper and "really crafty" so I was asked to help with the ornament making. We made 200 of these Christmas Balls. I had never done them before (only knew how to do them from Splitcoast). They were super easy and a big hit! We got these clear Christmas balls from Hobby Lobby for cheap and then we stuffed tinsel in them. I cut circles with my coluzzle ahead of time. Then we just stamped the Engineer Castle (since we are an Engineer Battallion) and we wrote (with a red sharpie) 70 (for 70th Engineer's) and then the year 2006. Then I rolled each of the circles up and popped them into the balls. After that we put the topper back on and tied a red ribbon at the top and viola! Here is another picture of the ornament up closer.

Jacob is leaving tonight at 11:30 for training and so I plan to spend the day tomorrow stamping. Check back soon for updated work.

Saturday, October 14, 2006

I got to stamp tonight! Wohoo!!


So I got to stamp tonight. I stamped some stuff for my secret sister for VSBN (Virtual Scrapbooking Night) on Splitcoast. She and I are both hostesses. This is for her "reveal package" letting her know who I am. I have sent her several cards throughout the last few weeks. So this is kind of the end of it all. Anyhow, Jacob is doing staff duty tonight (24 hour duty) so I finally decided what better way to spend my alone time then stamp. :o) I got a great package today from Christine P from Splitcoast. In it she sent me a template for making pouches and one for making boxes to put cards in. So this is a pic of the card I made her, the box that has blank cards and envelopes in it, and the pouch that I will put candy in. She likes pink and brown so that is why the colors I used were chosen. (trust me, it's brown even thought it looks black in the picture.)


This is one of the cards and matching envelopes that are in the box I made. There are 8 cards in all.

I found these blank frames by EK Success at Walmart the other day for $2 or so. Might have been less, I don't remember. Anyhow, I thought it would be fun to stamp on it to add to the package. I had to use craft inks and I only have the Rich Regals colors from Stampin Up! in craft inks so I went with So Saffron and Regal Rose. I love the way it turned out!

So anyhow, that was my night of stamping. :o)